OpenAI launched ChatGPT at the end of 2022, as you may already know. As everyone knows, ChatGPT is a very powerful tool. Fortunately, we can use the official API to take advantage of this feature as developers.
In today's lesson, we'll learn how to use it in a Laravel project. So, this time we not going to build chat based app. Because you know there's chatgpt already and chatgpt can be used not just for chat.
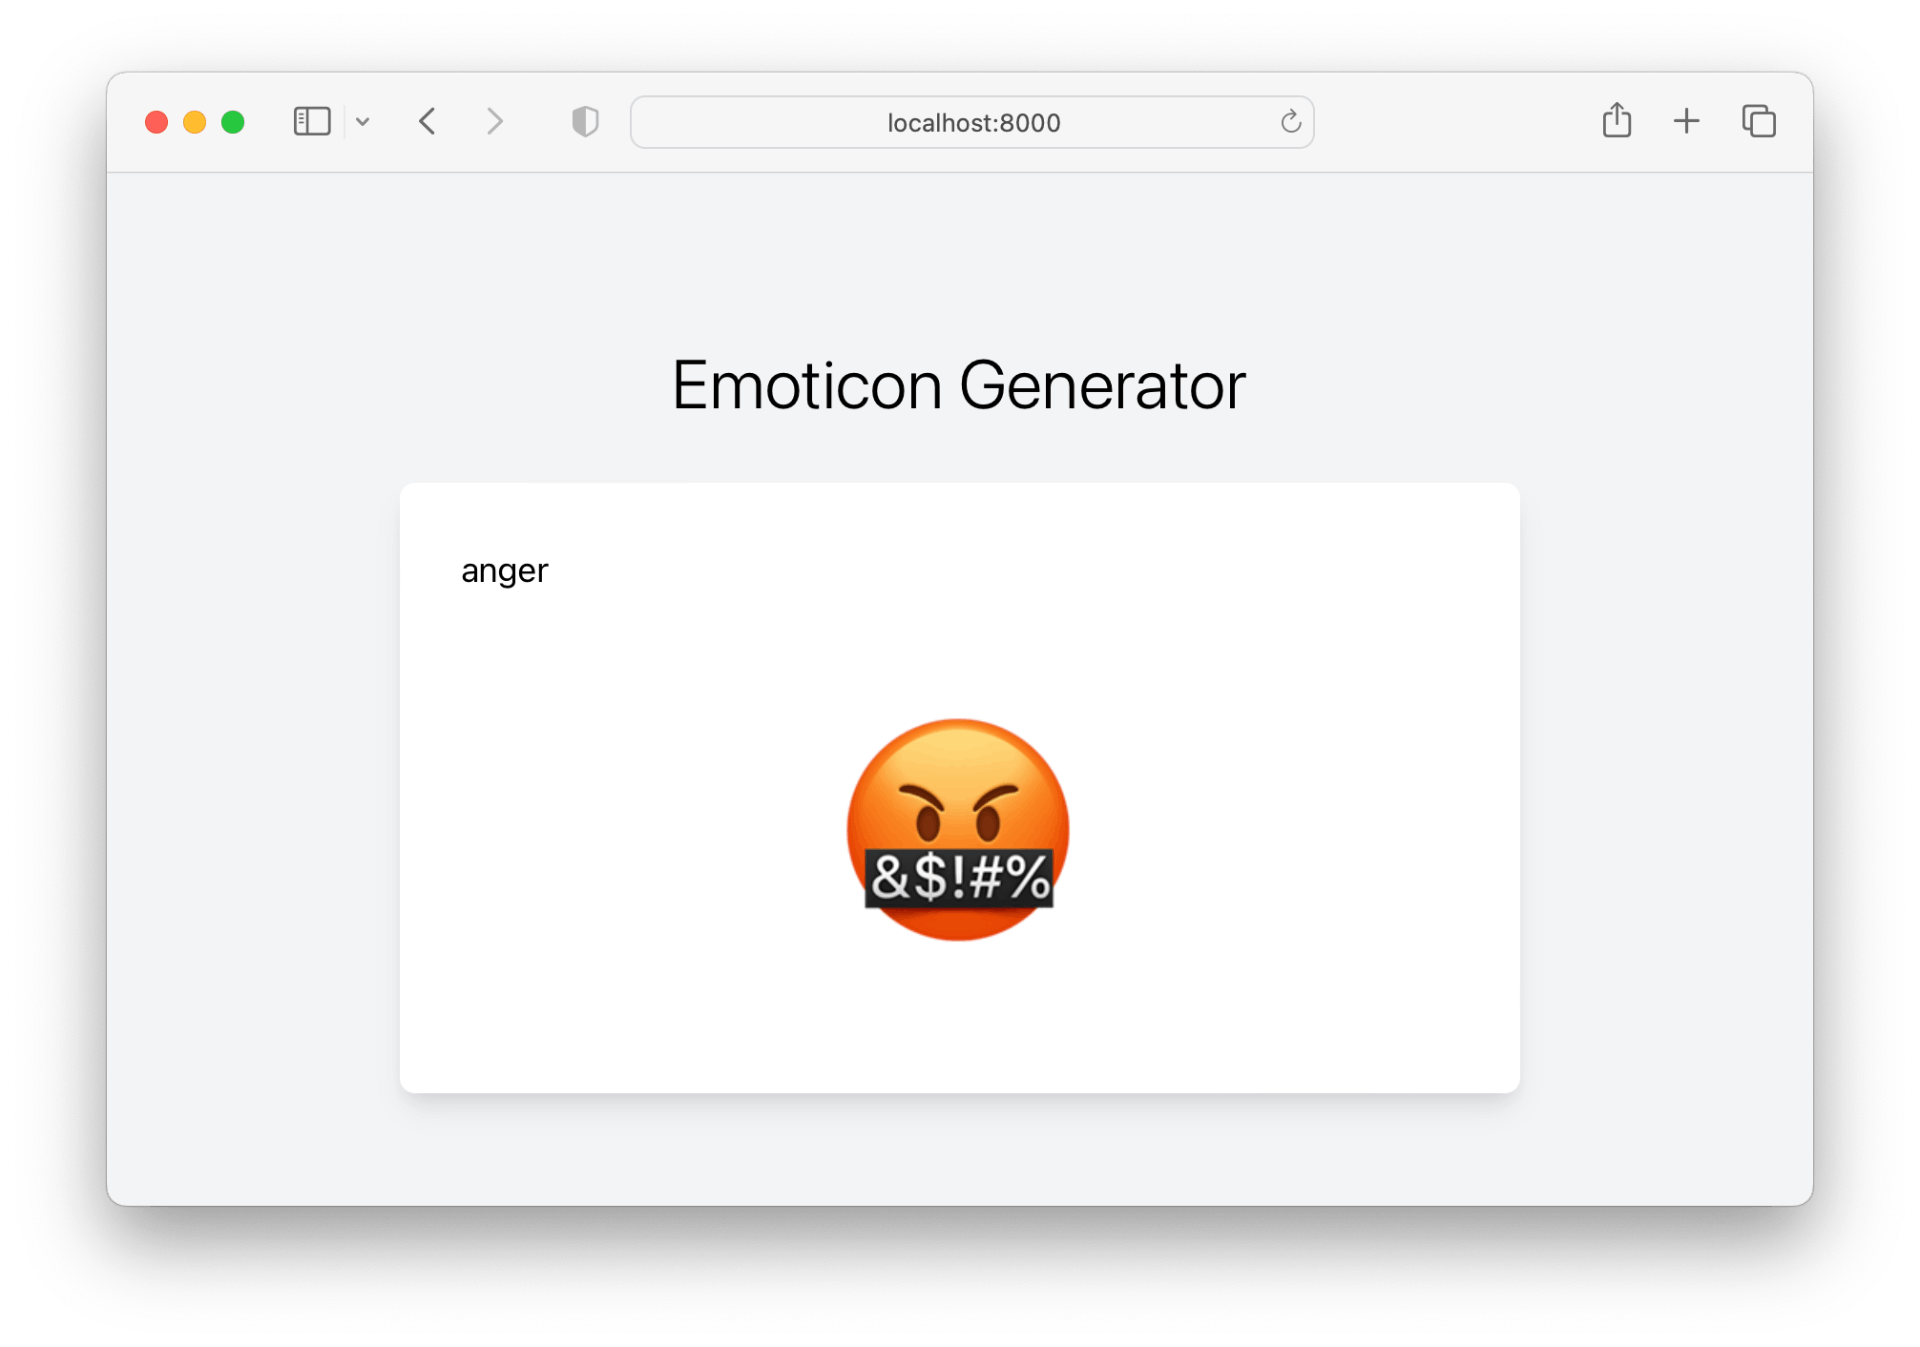
The other day I found some nice app to generate emoticon https://logsnag.com/icon, we can type any word and the API will give the emoticon representation of it. Here's what it look like.
Setup project
Let's create new laravel project.
laravel new chatgpt-laravelNow let's add some package to interact with openai API.
composer require openai-php/laravelThen publish the configuration file.
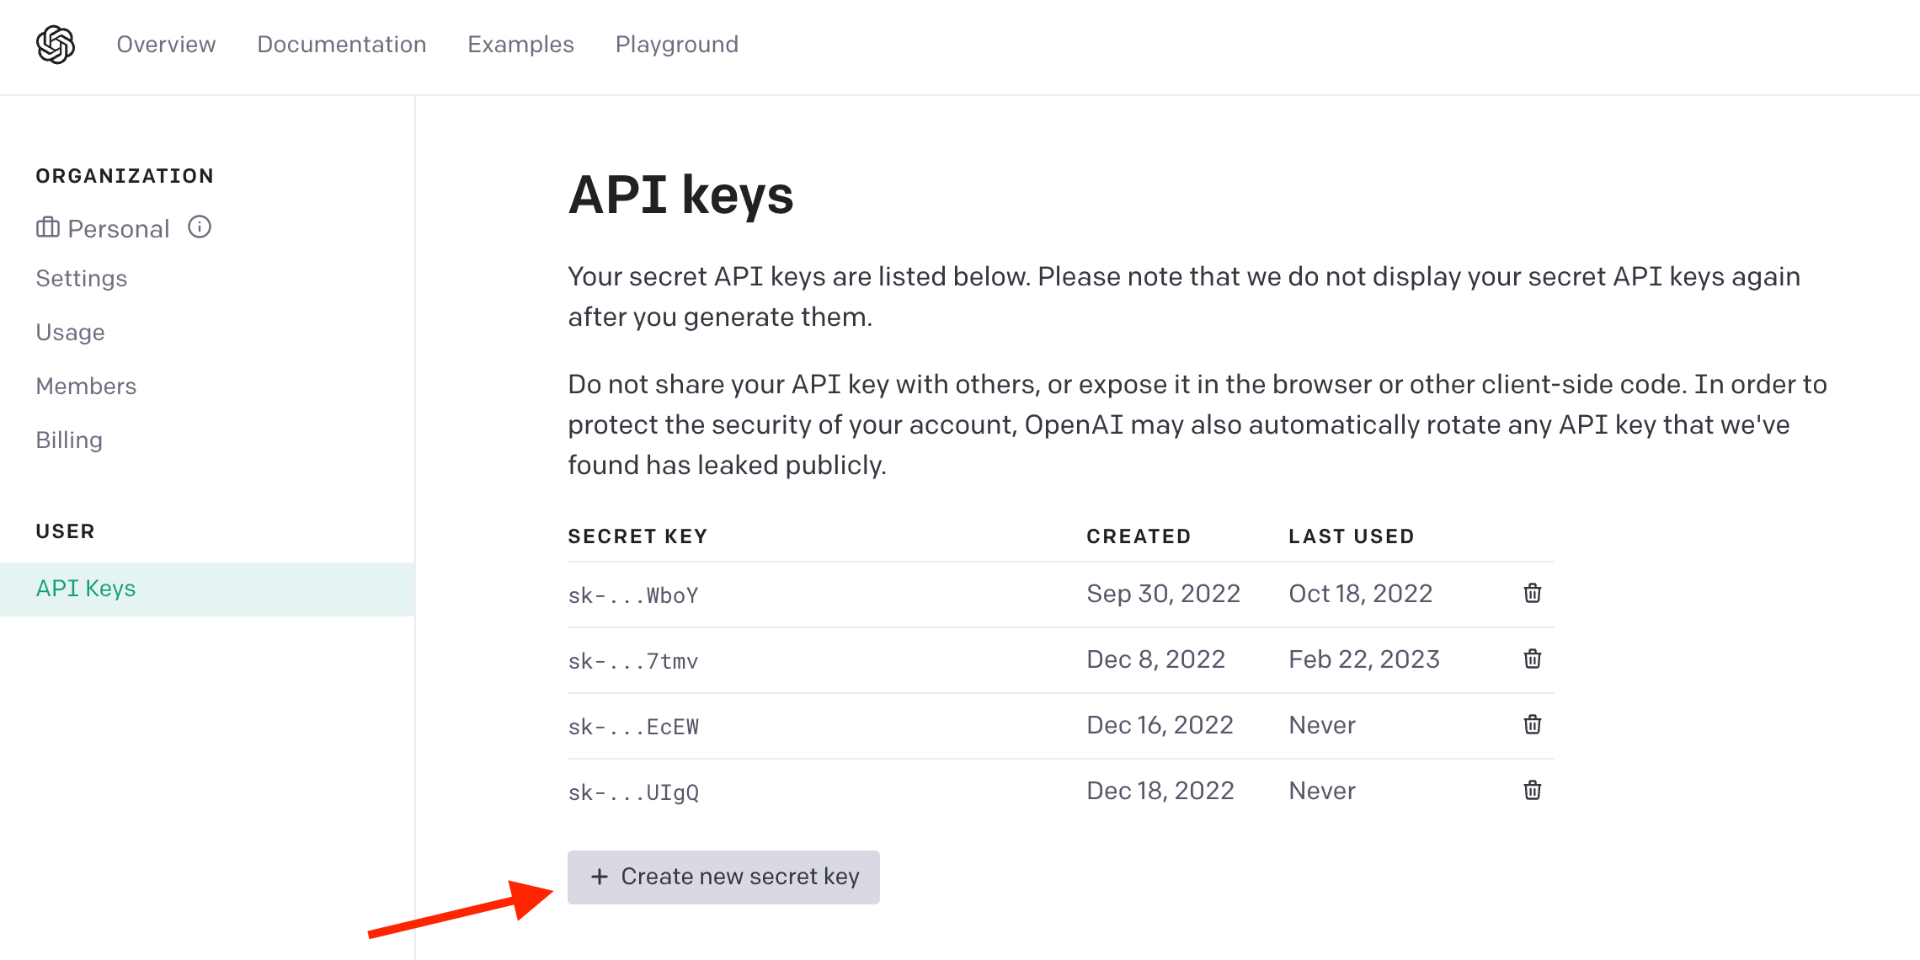
php artisan vendor:publish --provider="OpenAI\Laravel\ServiceProvider"Next go to https://platform.openai.com/ you can register there you will get free access $18 credit for next three months.
After that go to https://platform.openai.com/account/api-keys and generate the API token.
Then add your API KEY to .env file:
OPENAI_API_KEY=sk-...
Create API
Now let's create controller to provide the API for generating the emoticon for any given text.
php artisan make:controller ApiControllerHere's the controller content.
<?php

namespace App\Http\Controllers;

use Illuminate\Http\Request;
use Illuminate\Support\Arr;
use OpenAI\Laravel\Facades\OpenAI;

class ApiController extends Controller {

    public function index(Request $request)
    {
        $messages = [
            ['role' => 'system', 'content' => 'Reply only with one emoticon.'],
            ['role' => 'user', 'content' => $request->get('content')],
        ];
        $result = OpenAI::chat()->create([
            'model' => 'gpt-3.5-turbo',
            'messages' => $messages,
        ]);

        return Arr::get($result, 'choices.0.message');
    }

}
Explanation:
- With chatgpt we can tell the bot what they task are, in this case in
role:systemwe tell the bot to always reply with emoticon. - If you want the chatgpt to remember the conversation you can always put the response message to the
$messages. Eg:
$messages = [
    ['role' => 'system', 'content' => 'Reply only with one emoticon.'],
    ['role' => 'user', 'content' => $request->get('content')],
	  ['role' => 'assistant', 'content' => '👍']
]
And then don't forget to register the controller to the routes. Go to routes/api.php.
<?php

use App\Http\Controllers\ApiController;
use Illuminate\Support\Facades\Route;

Route::get("/emoji", [ApiController::class, "index"]);
Create UI to interact with our API
Now go to welcome.blade.php and add this form to capture user text input and generate icon from it.
<div class="p-6 bg-gray-50 border rounded-lg shadow-lg">
  <div id="emoticon-container">
    <div class="flex justify-between items-center w-full">
      <input
        type="text"
        class="p-2 text-lg focus:outline-none bg-transparent"
        value="{{ e('anger') }}"
      />
      <div id="loading-container" class="invisible">
        <svg
          fill="none"
          class="h-8 w-8 animate-spin text-orange-600"
          view-box="0 0 32 32"
          xmlns="http://www.w3.org/2000/svg"
        >
          <path
            clip-rule="evenodd"
            d="M15.165 8.53a.5.5 0 01-.404.58A7 7 0 1023 16a.5.5 0 011 0 8 8 0 11-9.416-7.874.5.5 0 01.58.404z"
            fill="currentColor"
            fill-rule="evenodd"
          />
        </svg>
      </div>
    </div>
    <div style="margin: 50px 200px ">
      <p id="emoji-display" class="mt-4 text-center w-full text-9xl">🤬</p>
    </div>
  </div>
</div>
Then add some javascript to listent text input change and then call the api to generate the emoticon.
const emoticonForm = document.querySelector("#emoticon-container");
const userInput = emoticonForm.querySelector('input[type="text"]');
const emojiDisplay = emoticonForm.querySelector("p");
userInput.addEventListener(
  "input",
  debounce((event) => {
    fetchEmoji();
  }, 500)
);

function fetchEmoji() {
  const userInput = emoticonForm.querySelector('input[type="text"]');
  const emojiDisplay = document.getElementById("emoji-display");
  const loadingContainer = document.querySelector("#loading-container");
  loadingContainer.classList.remove("invisible");

  fetch(`/api/emoji?content=${userInput.value}`, {
    method: "GET",
    headers: {
      "Content-Type": "application/json",
    },
  })
    .then((response) => response.json())
    .then(({ content }) => {
      emojiDisplay.innerText = content;
      loadingContainer.classList.add("invisible");
    })
    .catch((error) => console.error(error));
}

function debounce(callback, delay) {
  let timeoutId;

  return function () {
    const args = arguments;
    const context = this;

    clearTimeout(timeoutId);

    timeoutId = setTimeout(function () {
      callback.apply(context, args);
    }, delay);
  };
}
Hopefully you can get the idea how to use openai chatgpt api in you laravel project.