Eventually, if you create a website with a feature such as uploading images for a profile, you will inevitably have to deal with large image sizes. Therefore, it is important to compress the image size to make it smaller. Doing this on the server will be more expensive, so a very easy solution is to compress the image through the browser client.
Browser Image Compression
After trying several image compression libraries, I found this one to be the easiest to use and it just works. This library can be used to compress images with the main thread or web workers.
If you are using the main thread to render heavy objects, you can choose to do that with web workers so we can get the best experience for users using our application.
The way this library works is by rendering the given image to a canvas and then exporting it to a blog file. We can change the option to determine how much information will be removed when doing the compression, but most of the time this library works better when the maximum compressed size is set to one mega byte.
You can see the full source code here.
Compress Image in Next.js
Browser Image Compression library itself is created with vanilla JavaScript and it should be easy to use in any frontend framework. I will show you how to use it in a Next.js or React.js application and a traditional vanilla JavaScript application.
Create new next.js project.
npx create-next-app compress-imageAfter that let's add this library using npm.
npm install browser-image-compression --saveNow let's create a simple UI to retrieve image and display the compressed image.
<main className={styles.main}>
    <h1 className={styles.title}>
        Compress Image in <a href="https://nextjs.org">Next.js!</a>
    </h1>

    <p className={styles.description}>
        <input className={styles.inputFile} type={"file"} accept="image/*" onChange={runCompression} />
    </p>

    <div className={styles.grid}>
        {image && (
        <div className={styles.card}>
            <p>Original</p>
            <p>Size: {formatSize(image.size)} MB</p>
            <img src={URL.createObjectURL(image)} className={styles.imgResult} alt="Original" />
        </div>
        )}
        {compressed && (
        <div className={styles.card}>
            <p>Compressed</p>
            <p>Size: {formatSize(compressed.size)} MB</p>
            <img src={URL.createObjectURL(compressed)} className={styles.imgResult} alt="Compressed" />
        </div>
        )}
    </div>
</main>
Now add an event listener when the user opens the image via the input file form.
const runCompression = (e) => {
    setImage(e.target.files[0])
    compressImage(e.target.files[0]);
}
We also need to setup the state to display the before and after for the image that we compressed.
const [image, setImage] = useState(null);
const [compressed, setCompressed] = useState(null);
To make it easier to see the size of the image let's write some function to format the size.
const formatSize = (size) => {
    return (size / 1024 / 1024).toFixed(2)
}
Now import the library.
import imageCompression from 'browser-image-compression';Then, we can compress the image with this function. In this example, we set the config to a maximum file size of 1 megabyte and we want to compress it via a web worker.
const compressImage =  async(file) => {
    const options = {
        maxSizeMB: 1,
        maxWidthOrHeight: 1920,
        useWebWorker: true
    }
    const result = await imageCompression(file, options);
    setCompressed(result)
}
With all that here's the full source code.
import Head from 'next/head'
import Image from 'next/image'
import { useState } from 'react'
import styles from '../styles/Home.module.css'
import imageCompression from 'browser-image-compression';

export default function Home() {
  const [image, setImage] = useState(null);
  const [compressed, setCompressed] = useState(null);

  const runCompression = (e) => {
    setImage(e.target.files[0])
    compressImage(e.target.files[0]);
  }

  const formatSize = (size) => {
    return (size / 1024 / 1024).toFixed(2)
  }

  const compressImage =  async(file) => {
    const options = {
      maxSizeMB: 1,
      maxWidthOrHeight: 1920,
      useWebWorker: true
    }
    const result = await imageCompression(file, options);
    setCompressed(result)
  }

  return (
    <div className={styles.container}>
      <Head>
        <title>Compress Image in Browser with Javascript</title>
        <meta name="description" content="Compress Image in Browser with Javascript" />
        <link rel="icon" href="/favicon.ico" />
      </Head>

      <main className={styles.main}>
        <h1 className={styles.title}>
          Compress Image in <a href="https://nextjs.org">Next.js!</a>
        </h1>

        <p className={styles.description}>
          <input className={styles.inputFile} type={"file"} accept="image/*" onChange={runCompression} />
        </p>

        <div className={styles.grid}>
          {image && (
            <div className={styles.card}>
              <p>Original</p>
              <p>Size: {formatSize(image.size)} MB</p>
              <img src={URL.createObjectURL(image)} className={styles.imgResult} alt="Original" />
            </div>
          )}
          {compressed && (
            <div className={styles.card}>
              <p>Compressed</p>
              <p>Size: {formatSize(compressed.size)} MB</p>
              <img src={URL.createObjectURL(compressed)} className={styles.imgResult} alt="Compressed" />
            </div>
          )}
        </div>
      </main>
    </div>
  )
}
And here's the CSS.
.container {
padding: 0 2rem;
}
.main {
min-height: 100vh;
padding: 4rem 0;
flex: 1;
display: flex;
flex-direction: column;
justify-content: center;
align-items: center;
}
.title a {
color: #0070f3;
text-decoration: none;
}
.title a:hover,
.title a:focus,
.title a:active {
text-decoration: underline;
}
.title {
margin: 0;
line-height: 1.15;
font-size: 4rem;
}
.title,
.description {
text-align: center;
max-width: 500px;
}
.description {
margin: 4rem 0;
line-height: 1.5;
font-size: 1.5rem;
}
.code {
background: #fafafa;
border-radius: 5px;
padding: 0.75rem;
font-size: 1.1rem;
font-family: Menlo, Monaco, Lucida Console, Liberation Mono, DejaVu Sans Mono,
Bitstream Vera Sans Mono, Courier New, monospace;
}
.grid {
display: flex;
align-items: center;
justify-content: center;
flex-wrap: wrap;
max-width: 1500px;
}
.card {
margin: 1rem;
padding: 1.5rem;
text-align: left;
color: inherit;
text-decoration: none;
border: 1px solid #eaeaea;
border-radius: 10px;
transition: color 0.15s ease, border-color 0.15s ease;
max-width: 700px;
}
.card:hover,
.card:focus,
.card:active {
color: #0070f3;
border-color: #0070f3;
}
.card h2 {
margin: 0 0 1rem 0;
font-size: 1.5rem;
}
.card p {
margin: 0;
font-size: 1.25rem;
line-height: 1.5;
}
.logo {
height: 1em;
margin-left: 0.5rem;
}
.inputFile {
background-color: #78b5fb;
padding: 12px;
font-size: 24px;
border-radius: 8px;
border: none;
}
.inputFile::file-selector-button {
font-weight: lighter;
color: #183f6e;
padding: 0.5em;
border-radius: 3px;
border: none;
margin-right: 12px;
}
.imgResult {
max-width: 700px;
width: 100%;
margin-top: 1rem;
}
@media (max-width: 600px) {
.grid {
width: 100%;
flex-direction: column;
}
}
@media (prefers-color-scheme: dark) {
.card,
.footer {
border-color: #222;
}
.code {
background: #111;
}
.logo img {
filter: invert(1);
}
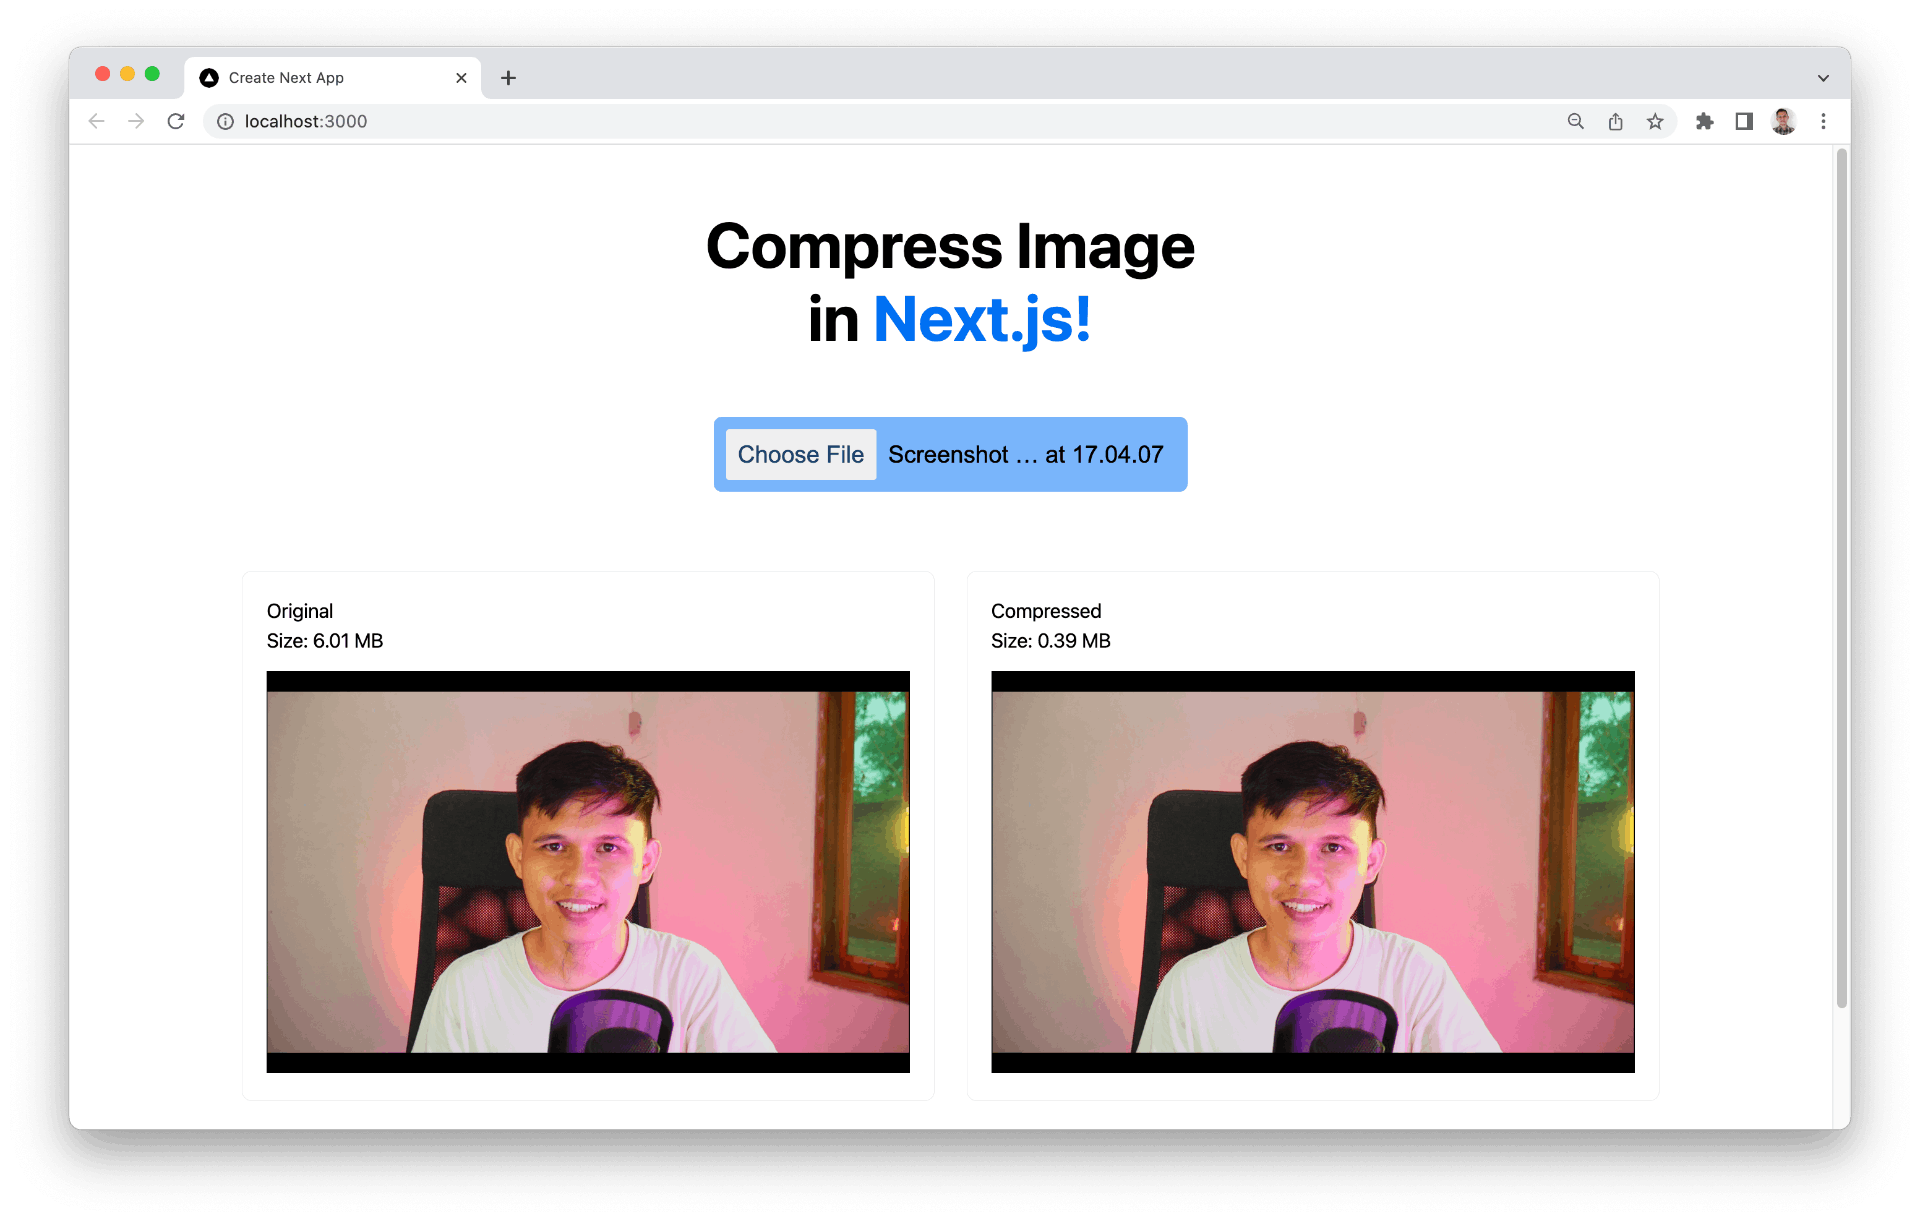
}And here's what the UI should look like.
Compress Image in Vanilla Javascript
To use this library in Vanilla JavaScript, you can import the library via a CDN like this.
<script src="https://cdn.jsdelivr.net/npm/browser-image-compression@2.0.0/dist/browser-image-compression.js"></script>Then provide the html file like this.
<body>
    <h1>Hello Vanilla!</h1>
    <input type="file" id="file" accept="image/*" />
    <div id="result-container"></div>
    <script src="src/index.js"></script>
</body>
And then the JavaScript part is like this.
import "./styles.css";
import imageCompression from "browser-image-compression";

const file = document.getElementById("file");
file.addEventListener("change", async (e) => {
  const file = e.target.files[0];
  console.log(`originalFile size ${(file.size / 1024 / 1024).toFixed(2)} MB`);

  const options = {
    maxSizeMB: 1,
    maxWidthOrHeight: 1920,
    useWebWorker: true
  };

  try {
    const result = await imageCompression(file, options);
    console.log(
      `compressed image size ${(result.size / 1024 / 1024).toFixed(2)} MB`
    );

    displayResult({ origin: file, result });
  } catch (err) {
    console.log(err);
  }
});

function displayResult({ origin, result }) {
  let container = document.querySelector("#result-container");
  container.innerHTML = `
  <div>
    <div>
      <p>Original Size : ${(origin.size / 1024 / 1024).toFixed(2)} MB</p>
      <img width="100" src="${URL.createObjectURL(origin)}" />
    </div>
    <div>
    <p>Original Size : ${(result.size / 1024 / 1024).toFixed(2)} MB</p>
      <img width="100" src="${URL.createObjectURL(result)}" />
    </div>
  </div>
  `;
}
You also can see the full example here: https://codesandbox.io/s/dazzling-tree-q4kun6