How to use OpenAI in Laravel?
OpenAI is a powerful artificial intelligence platform that allows developers to easily build AI-powered applications.
Whether you're a seasoned Laravel developer or just getting started, this tutorial will provide you with the necessary steps to use OpenAI's machine learning capabilities in your web applications. We'll cover everything from setting up your OpenAI account and installing the necessary dependencies to using OpenAI's API and integrating it into your Laravel application.
By the end of this tutorial, you'll have a solid understanding of how to use OpenAI in your Laravel projects and be well on your way to building intelligent, machine learning-powered web applications.
Create new Project
Let's create a new project called 'Writebot'. This app will help our users to write articles for any given title they want. I know this sounds classic, but the goal is to help you understand what it takes to use OpenAI in your Laravel project.
laravel new writebot
Register to OpenAI
Next, we need to get access to the OpenAI API. First, go to https://openai.com/api/ and click signup button.

After signing up, go to https://beta.openai.com/account/api-keys and click the button Create new secret key and copy the key and put it in our .env file inside our Laravel project.
OPENAI_API_KEY="sk-..."
Install openapi client
Actually, you should be able to interact with the endpoint of the API directly, but if you don't want to do that, we can use this package.
composer require openai-php/client
You can try experiment with the API using the playground and generate the API call with curl.
The openai-client package source code is here: https://github.com/openai-php/client.
Create Writebot Editor
Next, we need to create a view to display the generated article to the user. We can also add a button to allow the user to generate a new article if they are not satisfied with the current one.
Finally, we can add a feature to allow the user to save the generated article for future reference. We will create super simple editor for our writebot web app.
We will use the CDN TailwindCSS so we don't need to install the npm package, making development of our application simpler and faster. Save it to resources/view/writer.blade.php.
<!DOCTYPE html>
<html lang="{{ str_replace('_', '-', app()->getLocale()) }}">
  <head>
    <meta charset="utf-8" />
    <meta name="viewport" content="width=device-width, initial-scale=1" />

    <title>Writebot - AI Writing Assistant for Bloggers</title>

    <!-- Fonts -->
    <link
      href="https://fonts.bunny.net/css2?family=Space+Grotesk:wght@400;600;700&display=swap"
      rel="stylesheet"
    />

    <script src="https://cdn.tailwindcss.com"></script>

    <style>
      body {
        font-family: "Space Grotesk", sans-serif;
      }
      .title:empty:before {
        content: attr(data-placeholder);
        color: gray;
      }
    </style>

    <script src="https://unpkg.com/marked" defer></script>
  </head>
  <body class="antialiased">
    <div
      class="relative flex items-top justify-center min-h-screen bg-gray-100 dark:bg-gray-900 sm:items-center py-4 sm:pt-0"
    >
      <div class="max-w-6xl w-full mx-auto sm:px-6 lg:px-8 space-y-4 py-4">
        <div class="text-center text-gray-800 dark:text-gray-300 py-4">
          <h1 class="text-7xl font-bold">Writebot</h1>
        </div>

        <div
          class="w-full rounded-md bg-white border-2 border-gray-600 p-4 min-h-[60px] h-full text-gray-600"
        >
          <form
            action="/write/generate"
            method="post"
            class="inline-flex gap-2 w-full"
          >
            @csrf
            <input
              required
              name="title"
              class="w-full outline-none text-2xl font-bold"
              placeholder="Type your article title..."
            />
            <button
              class="rounded-md bg-emerald-500 px-4 py-2 text-white font-semibold"
            >
              Generate
            </button>
          </form>
        </div>
        <div
          class="w-full rounded-md bg-white border-2 border-gray-600 p-4 min-h-[720px] h-full text-gray-600"
        >
          <textarea
            class="min-h-[720px] h-full w-full outline-none"
            spellcheck="false"
          >
{{ $content }}</textarea
          >
        </div>
      </div>
    </div>
  </body>
</html>
And then register the UI to write endpoint and we will pass empty variable for $title and $content we will use this later to display the generated content.
// routes/web.php

Route::get('/write', function () {
    $title = '';
    $content = '';
    return view('write', compact('title', 'content'));
});
Make Controller
Now let's add the controller to receive input from the user and call the OpenAI package to generate our article.
php artisan make:controller ArticleGenerator
Don't forget to register the endpoint to our routes.
use App\Http\Controllers\ArticleGenerator;

Route::post('/write/generate', [ArticleGenerator::class, 'index']);
In the ArticleGenerator let's add method index get the user input and call the OpenAI API to generate the content that we want.
// app/Http/Controllers/ArticleGenerator.php

public function index(Request $input)
{
    if ($input->title == null) {
        return;
    }

    $title = $input->title;

    $client = OpenAI::client(env('OPENAI_API_KEY'));

    $result = $client->completions()->create([
        "model" => "text-davinci-003",
        "temperature" => 0.7,
        "top_p" => 1,
        "frequency_penalty" => 0,
        "presence_penalty" => 0,
        'max_tokens' => 600,
        'prompt' => sprintf('Write article about: %s', $title),
    ]);

    $content = trim($result['choices'][0]['text']);


    return view('write', compact('title', 'content'));
}
Tips: You can use
confighelper when retrieving configuration from environment variables to reduce system calls to get the environment value from the system. See documentation here.
Load the config from config/app.php :
'openai_api_key' => env('OPENAI_API_KEY'),
Then run the config cache command to optimize the system call to get env value.
php artisan config:cache
Now you can use the config like this :
$client = OpenAI::client(config('app.openai_api_key'));
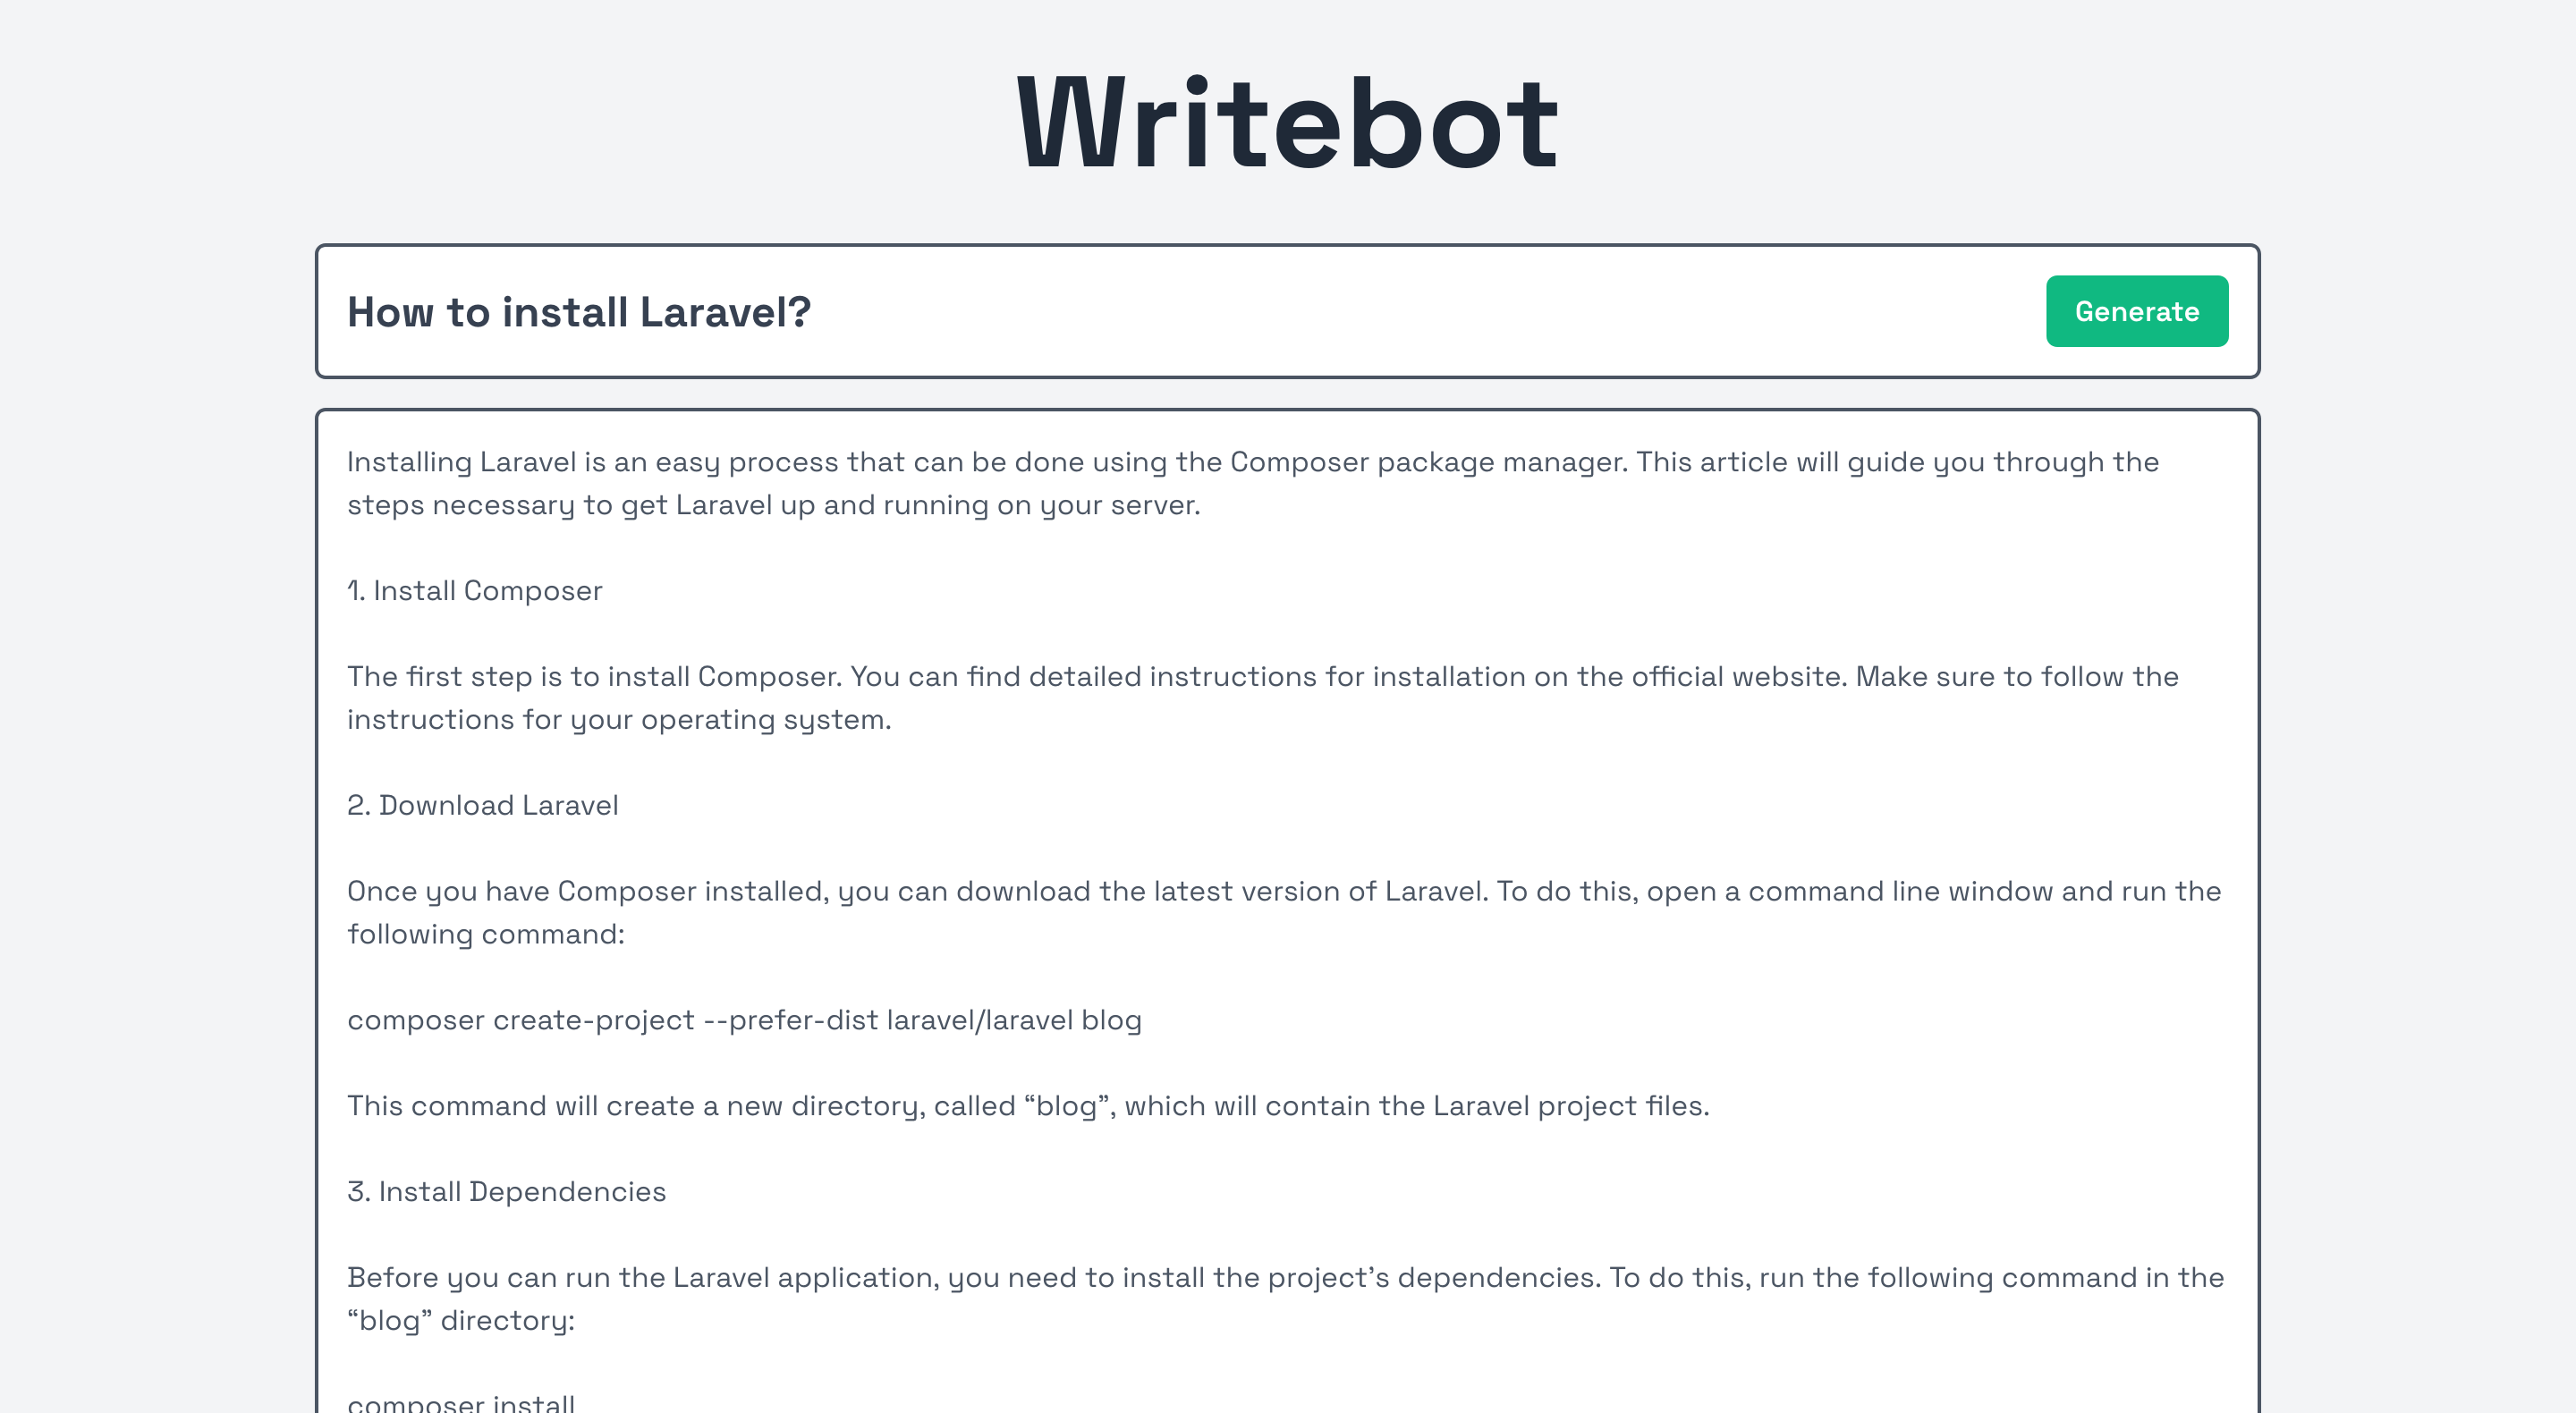
Finally, this is what the article would look like when the user generates it.
Conclusion
In this tutorial, we have seen how to use the OpenAI API in a Laravel project. We have seen the necessary steps to set up your OpenAI account, how to use the API and how to integrate it into a Laravel application.
Using OpenAI in your web applications can open up a world of possibilities and allow you to create powerful, AI-powered applications. With OpenAI and Laravel, the possibilities are limitless.
Get the full source code of this tutorial here: https://github.com/ahmadrosid/writebot
Anyway, thank you for reading this article. I hope it helps you to build your own AI-powered Laravel application. Thank you.