AI is prevalent these days, not only for end users but also for software developers like us. We don't need to create and host our own machine learning model to build a product using AI. Today, I will share another AI product by PhotoRoom that you can try for free with a trial.
What is PhotoRoom?
PhotoRoom is the all-in-one app that edits, designs and optimizes great visual content that helps you run your business from your phone. But recently they release an API that we can use to remove background of an image.
You can read the official documentation here.
Get PhotoRoom ApiKey
To access the PhotoRoom api we need to get the apikey first. Visit this page.
https://app.photoroom.com/api-dashboard

Once you have finished the registration, enable the API and copy the key you received.

Then copy the apikey and put it to .env file.
PHOTO_ROOM_API_KEY="..."We will access the key via the config helper, so let's register this api key to the config/app.php file.
'photo_room' => [
    'api_key' => env("PHOTO_ROOM_API_KEY")
],
Later on we can get the env with config helper like this.
config("app.photo_room.api_key")Create API Proxy for PhotoRoom
Next, let's create a new controller for our proxy to the PhotoRoom API. The reason we do this instead of calling the API directly from the frontend is because we want to secure the API key that we have.
First, create a controller using the php artisan command.
php artisan make:controller RemoveBackgroundControllerThen, register the controller in the routes/api.php file.
use App\Http\Controllers\RemoveBackgroundController;

Route::post("/remove-bg", [RemoveBackgroundController::class, "index"]);
Add a new method called index in the RemoveBackgroundController.
public function index(Request $request)
{
    ...
}
Then import the validator facade.
use Illuminate\Support\Facades\Validator;Validate the input make sure that our user uploading the valid images.
$validator = Validator::make($request->all(), [
    'photo' => 'required',
]);

if ($validator->fails()) {
    return response([
        "error" => true,
        "errors" => $validator->errors(),
    ], 400);
}
Import the Storage class.
use Illuminate\Support\Facades\Storage;Then save the uploaded image to the storage, we are going to save the original image to public/photos folder.
$photo = $request->file('photo');
$name = Str::random(40) . "." . $photo->getClientOriginalExtension();
Storage::putFileAs('public/photos', $photo, $name);
Don't forget to link the storage to the public folder so that the user can later view the photo from the public URL by running this command.
php artisan storage:linkSo we already have the image saved to our storage now it's time to remove the background with PhotoRoom API, first let's add guzzle package to our laravel project.
composer require guzzlehttp/guzzleNow import the Http wrapper for this package.
use Illuminate\Support\Facades\Http;And now we can use it like this.
$path = Storage::disk('public')->path('photos/' . $name);
$response = Http::withHeaders([
    'X-Api-Key' => config("app.photo_room.api_key")
])
->timeout(60)
->attach(
    'image_file', file_get_contents($path), $name
)->post('https://sdk.photoroom.com/v1/segment');
Check if we get the success response from the API, if not we return back the response from it.
if ($response->getStatusCode() != 200) {
    return $response;
}
Now the removed background image can be saved to our storage folder, we will save it to public/outputs.
Storage::put('public/outputs/'.$name, $response->getBody());
return [
    'original' => asset("/storage/photos/" . $name),
    'result' => asset("/storage/outputs/" . $name),
];
With all that here's the complete code for the RemoveBackgroundController class.
<?php

namespace App\Http\Controllers;

use Illuminate\Http\Request;
use Illuminate\Support\Facades\Http;
use Illuminate\Support\Facades\Storage;
use Illuminate\Support\Facades\Validator;
use Illuminate\Support\Facades\Log;
use Illuminate\Support\Str;

class RemoveBackgroundController extends Controller
{
    public function index(Request $request)
    {
        $validator = Validator::make($request->all(), [
            'photo' => 'required|image',
        ]);

        if ($validator->fails()) {
            return response([
                "error" => true,
                "errors" => $validator->errors(),
            ], 400);
        }

        $photo = $request->file('photo');
        $name = Str::random(40) . "." . $photo->getClientOriginalExtension();
        Storage::putFileAs('public/photos', $photo, $name);

        $path = Storage::disk('public')->path('photos/' . $name);
        $response = Http::withHeaders([
            'X-Api-Key' => config("app.photo_room.api_key")
        ])
        ->timeout(60)
        ->attach(
            'image_file', file_get_contents($path), $name
        )->post('https://sdk.photoroom.com/v1/segment');

        if ($response->getStatusCode() != 200) {
            return $response;
        }

        Storage::put('public/outputs/'.$name, $response->getBody());
        return [
            'original' => asset("/storage/photos/" . $name),
            'result' => asset("/storage/outputs/" . $name),
        ];
    }
}
Create UI with Blade
The UI will be very simple this time; we will only use the traditional blade template to create the UI. We will only provide an input file to upload images, and we will style it using static TailwindCSS.
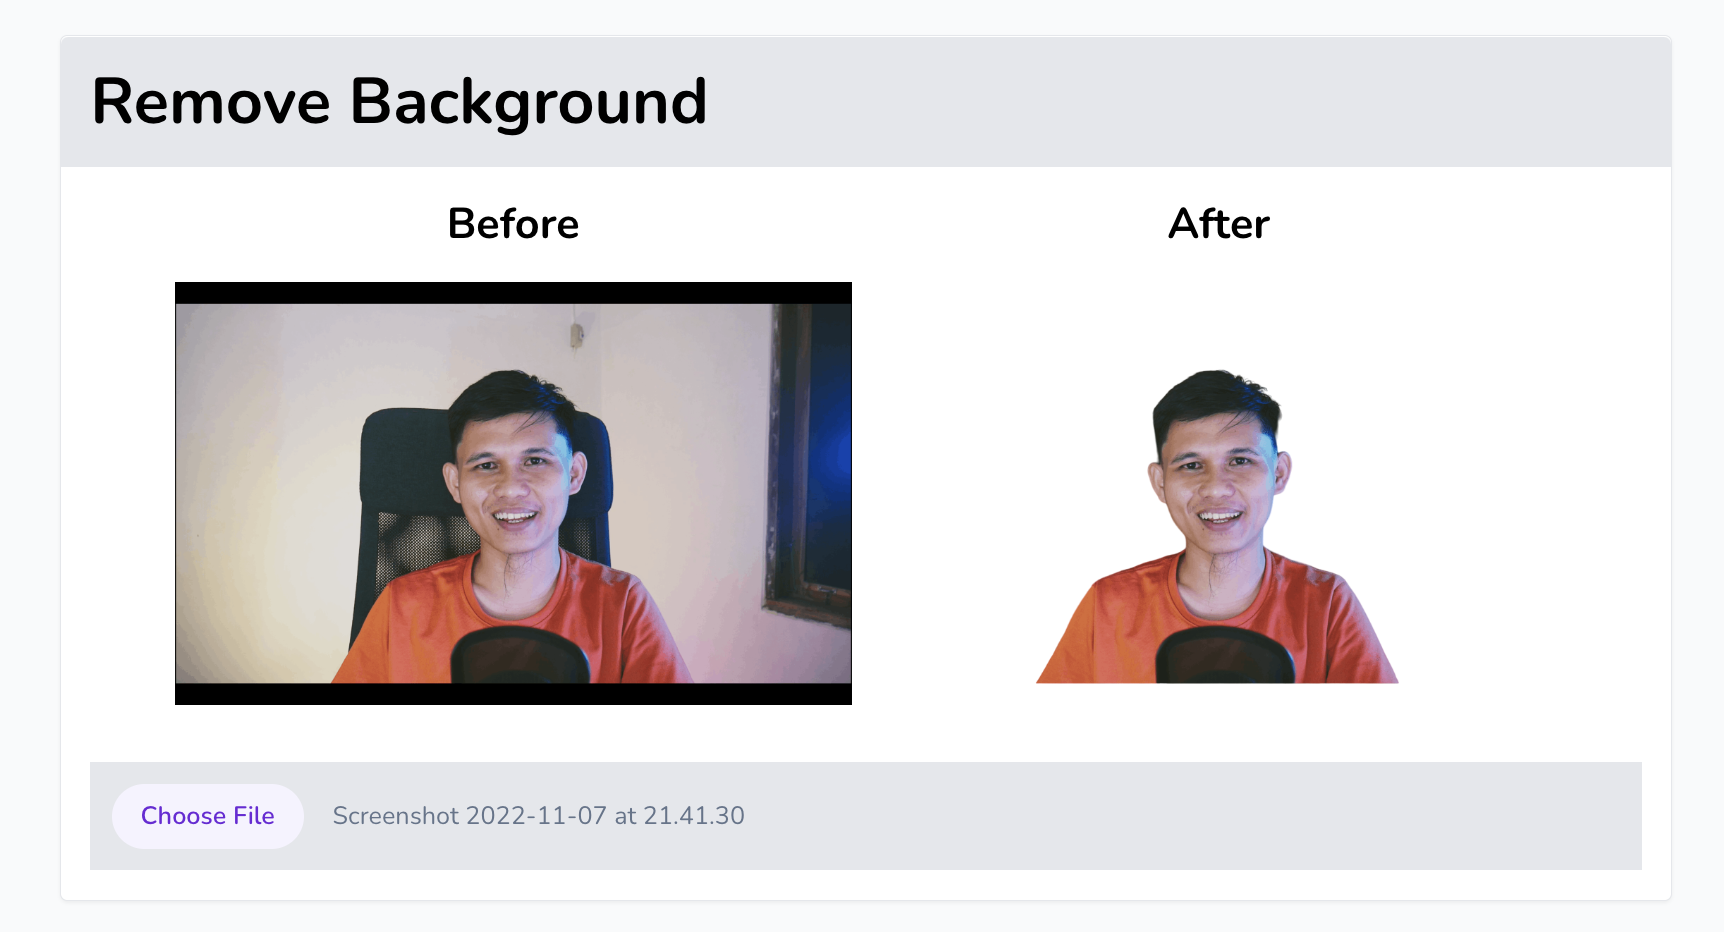
The goal is to make simple UI like this.
First import static javscript library for tailwindcss to our UI.
<script src="https://cdn.tailwindcss.com"></script>Note: Do not do this in production. Please use the TailwindCSS CLI; see the documentation here.
Now let's style our UI for upload the image.
<body class="antialiased bg-gray-50 dark:bg-gray-700">
    <div class="h-screen w-screen flex items-center justify-center">
        <form class="border bg-white rounded shadow-sm dark:bg-gray-600 w-full max-w-4xl">
            <div class="bg-gray-200 dark:bg-gray-800 p-4 rounded-t">
                <h2 class="font-bold text-4xl dark:text-gray-300">Remove Background</h2>
            </div>
            <div class="p-4">
                <div class="loading-container w-full flex"></div>
                <div class="photo-container grid grid-cols-2 gap-4 max-w-3xl mx-auto"></div>
                <input type="file" id="file" accept="image/*" class="block w-full text-sm text-slate-500 dark:text-slate-800
                        file:mr-4 file:py-2 file:px-4
                        file:rounded-full file:border-0
                        file:text-sm file:font-semibold
                        file:bg-violet-50 file:text-violet-700
                        hover:file:bg-violet-100
                        hover:file:cursor-pointer
                        mx-auto
                        bg-gray-200 p-3 dark:bg-gray-500
                        "/>
            </div>
        </form>
    </div>
</body>
Compress Image and Upload
First, we need to compress the file before uploading the image to ensure the best performance from the API. We will do this from browser client using browser-image-compression package.
Let's import it via cdnjs.
<script src="https://cdn.jsdelivr.net/npm/browser-image-compression@2.0.0/dist/browser-image-compression.js"></script>We will also need the axios package to send the image to our API.
<script src="https://unpkg.com/axios@1.2.2/dist/axios.min.js"></script>We will listent on change event from the input to trigger the compress image and upload it via axios.
const file = document.getElementById('file');
file.addEventListener('change', async (e) => {
    const file = e.target.files[0];
    console.log(`originalFile size ${(file.size / 1024 / 1024).toFixed(1)} MB`);

    const options = {
        maxSizeMB: 1,
        maxWidthOrHeight: 1920,
        useWebWorker: true
    }

    const loadingContainer = document.querySelector(".loading-container")
    loadingContainer.innerHTML = '<div class="cp-spinner mx-auto cp-round my-16"></div>';

    try {
        const result = await imageCompression(file, options);
        console.log(`compressed image size ${(result.size / 1024 / 1024).toFixed(1)} MB`);

        const formData = new FormData();
        formData.append('photo', result, result.name);
        const res = await axios.post('/api/remove-bg', formData);

        loadingContainer.innerHTML = "";
        displayResult(res.data);
    } catch (err) {
        console.log(err);
        loadingContainer.innerHTML = `<p class="py-8 text-2xl text-red-500">${err.message}</p>`;
    }
});
After the upload success we display with img tag.
function displayResult(data) {
    const container = document.querySelector(".photo-container");
    container.innerHTML = `
        <div class="grid place-items-center gap-4 pb-8">
            <h3 class="text-2xl font-bold">Before</h3>
            <img src="${data.original}" />
        </div>
        <div class="grid place-items-center gap-4 pb-8">
            <h3 class="text-2xl font-bold">After</h3>
            <img src="${data.result}" />
        </div>
    `;
}
Conclusion
We have already learned how to use the PhotoRoom API; today, we are focusing on the interaction with the AI. The UI side has been done in a very simple way, using vanilla JavaScript and traditional blade views with Laravel.
Now it is up to us how we can use this AI product to bring more value to the customers. Go and build awesome product with this API.
Grab the full source code on Github here.
Let me know if you have any questions for me; you can send a DM to my Twitter