Last year I wrote a tutorial to deploy your laravel application to Fly.io. But there is one problem with that, since deploying your laravel application to fly.io, you cannot save any files the laravel traditional ways. In today's article, we will talk about fixing that missing functionality.
Why stateless?
When deploying a Laravel application on Fly.io, it's crucial to make the application stateless. Fly.io uses Docker containers for deployment, which are designed to be ephemeral and disposable. Each new deployment creates a fresh Docker container, and any file storage within the container is lost during this process.
While Fly.io supports mounting volumes to Docker containers for persistent storage, this approach introduces additional complexity and maintenance overhead compared to using a dedicated file storage service like Google Cloud Storage (GCS) or Amazon S3.
The primary advantage of separating file storage from the application server is horizontal scalability. Fly.io allows you to easily scale your application by adding more servers in different regions during high-traffic events, such as Black Friday. By separating file storage, all servers can access the same set of files, ensuring a consistent user experience regardless of the server handling the request.
Moreover, a stateless application architecture promotes resilience and fault tolerance. If a server fails or needs to be replaced, a new server can be provisioned quickly without worrying about migrating or restoring file storage. The separation of concerns between the application server and file storage simplifies deployments, scaling, and disaster recovery.
Why using Tigris?
Well, because we are deploying our laravel application using Fly.io, we can easily integrate Tigris natively using the flyio command. We can easily just create new storage for our Fly.io machine using this command and you don't need to create account to Tigris to try this:
fly storage createAnd since Laravel supports Amazon S3, we can use Tigris as a drop-in replacement for Amazon S3. Just create new storage, and Fly.io will help us generate env config just like the one for Amazon S3, like this:
$ fly storage create
? Select Organization: Ovais Tariq (personal)
? Choose a name, use the default, or leave blank to generate one:
Your  project (polished-thunder-5646) is ready. See details and next steps with:

Set one or more of the following secrets on your target app.
AWS_ENDPOINT_URL_S3: https://fly.storage.tigris.dev
AWS_ACCESS_KEY_ID: xxxxxxxxxxxxxxxxxxxx
AWS_SECRET_ACCESS_KEY: xxxxxxxxxxxxxxxxxxxxxxxxxxxxxxxxxxxxxxxx
BUCKET_NAME: polished-thunder-5646
Let's create some project.
While writing this tutorial I found this nice model from Replit called sticker-maker. Let's create a new laravel project and name it Stickeriffic. The project will be simple laravel application using breeze starterkit with alphine and livewire.
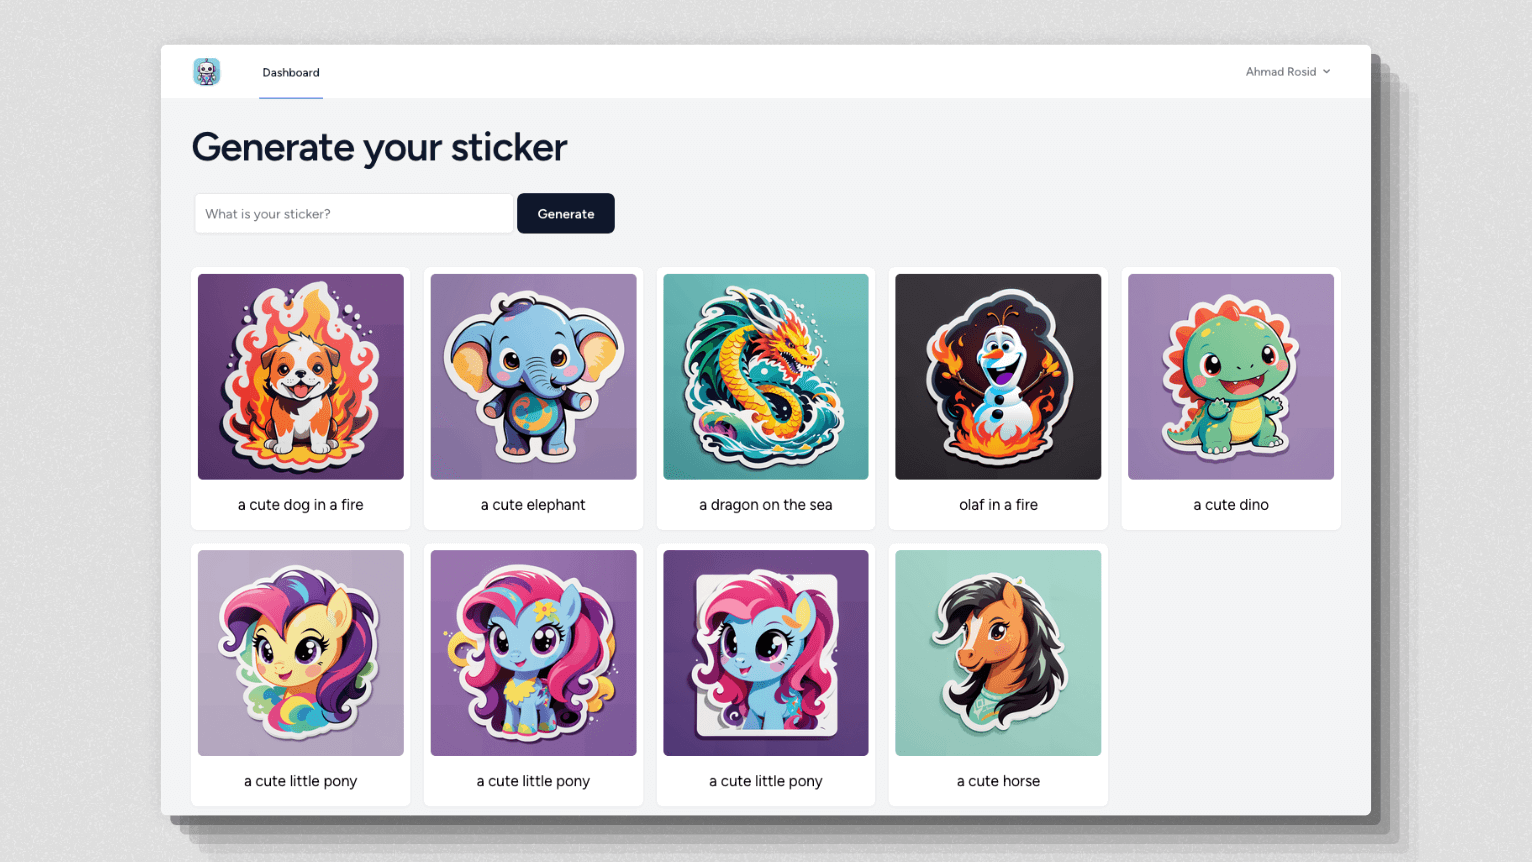
We will make the project very simple, it will only have one controller and two endpoint to generate a sticker.
Route::get('generate', [GenerationController::class, 'generate'])->name('generate');
Route::get('generate/get/{sticker}', [GenerationController::class, 'getGeneration'])->name('generate.get');
And the controller will be http call like this.
<?php
namespace App\Http\Controllers;
use Illuminate\Http\Request;
use Illuminate\Http\Response;
use Illuminate\Support\Facades\Http;
use App\Models\Sticker;
class GenerationController extends Controller
{
private function generateSticker($prompt, $user_id)
{
$response = Http::withHeaders([
'Authorization' => 'Token '. env('REPLICATE_API_TOKEN'),
])
->post('https://api.replicate.com/v1/predictions', [
'version' => '6443cc831f51eb01333f50b757157411d7cadb6215144cc721e3688b70004ad0',
'input' => [
'steps' => 20,
'width' => 1024,
'height' => 1024,
'prompt' => $prompt,
'upscale' => true,
'upscale_steps' => 10,
'negative_prompt' => '',
],
]);
if ($response->successful()) {
$data = $response->json();
$replicate_url = $data['urls']['get'];
Sticker::create([
'user_id' => $user_id,
'prompt' => $prompt,
'replicate_url' => $replicate_url,
'status' => Sticker::STATUS_PROCESSING,
]);
return redirect()->back();
} else {
$errorMessage = $response->body();
return response()->json([
'error' => $errorMessage
], Response::HTTP_BAD_REQUEST);
}
}
public function generate(Request $request) {
$prompt = $request->input('prompt');
if (!$prompt) {
$errorMessage = 'Prompt input is required!';
return response()->json([
'error' => $errorMessage
], Response::HTTP_BAD_REQUEST);
}
return $this->generateSticker($prompt, $request->user()->id);
}
public function getGeneration(Request $request, $sticker_id) {
$sticker = Sticker::findOrFail($sticker_id);
if (!$sticker) {
$errorMessage = 'Sticker not found!';
return response()->json([
'error' => $errorMessage
], Response::HTTP_BAD_REQUEST);
}
if ($sticker->sticker_url !== null) {
return response()->json([
'data' => $sticker,
]);
}
$response = Http::withHeaders([
'Authorization' => 'Token '. env('REPLICATE_API_TOKEN'),
])
->get($sticker->replicate_url);
if ($response->successful()) {
$data = $response->json();
if (isset($data['output'])) {
$sticker->sticker_url = $data['output'][0];
$sticker->status = Sticker::STATUS_SUCCESS;
$sticker->save();
}
return response()->json([
'data' => $sticker,
]);
} else {
$errorMessage = $response->body();
return response()->json([
'error' => $errorMessage
], Response::HTTP_BAD_REQUEST);
}
}
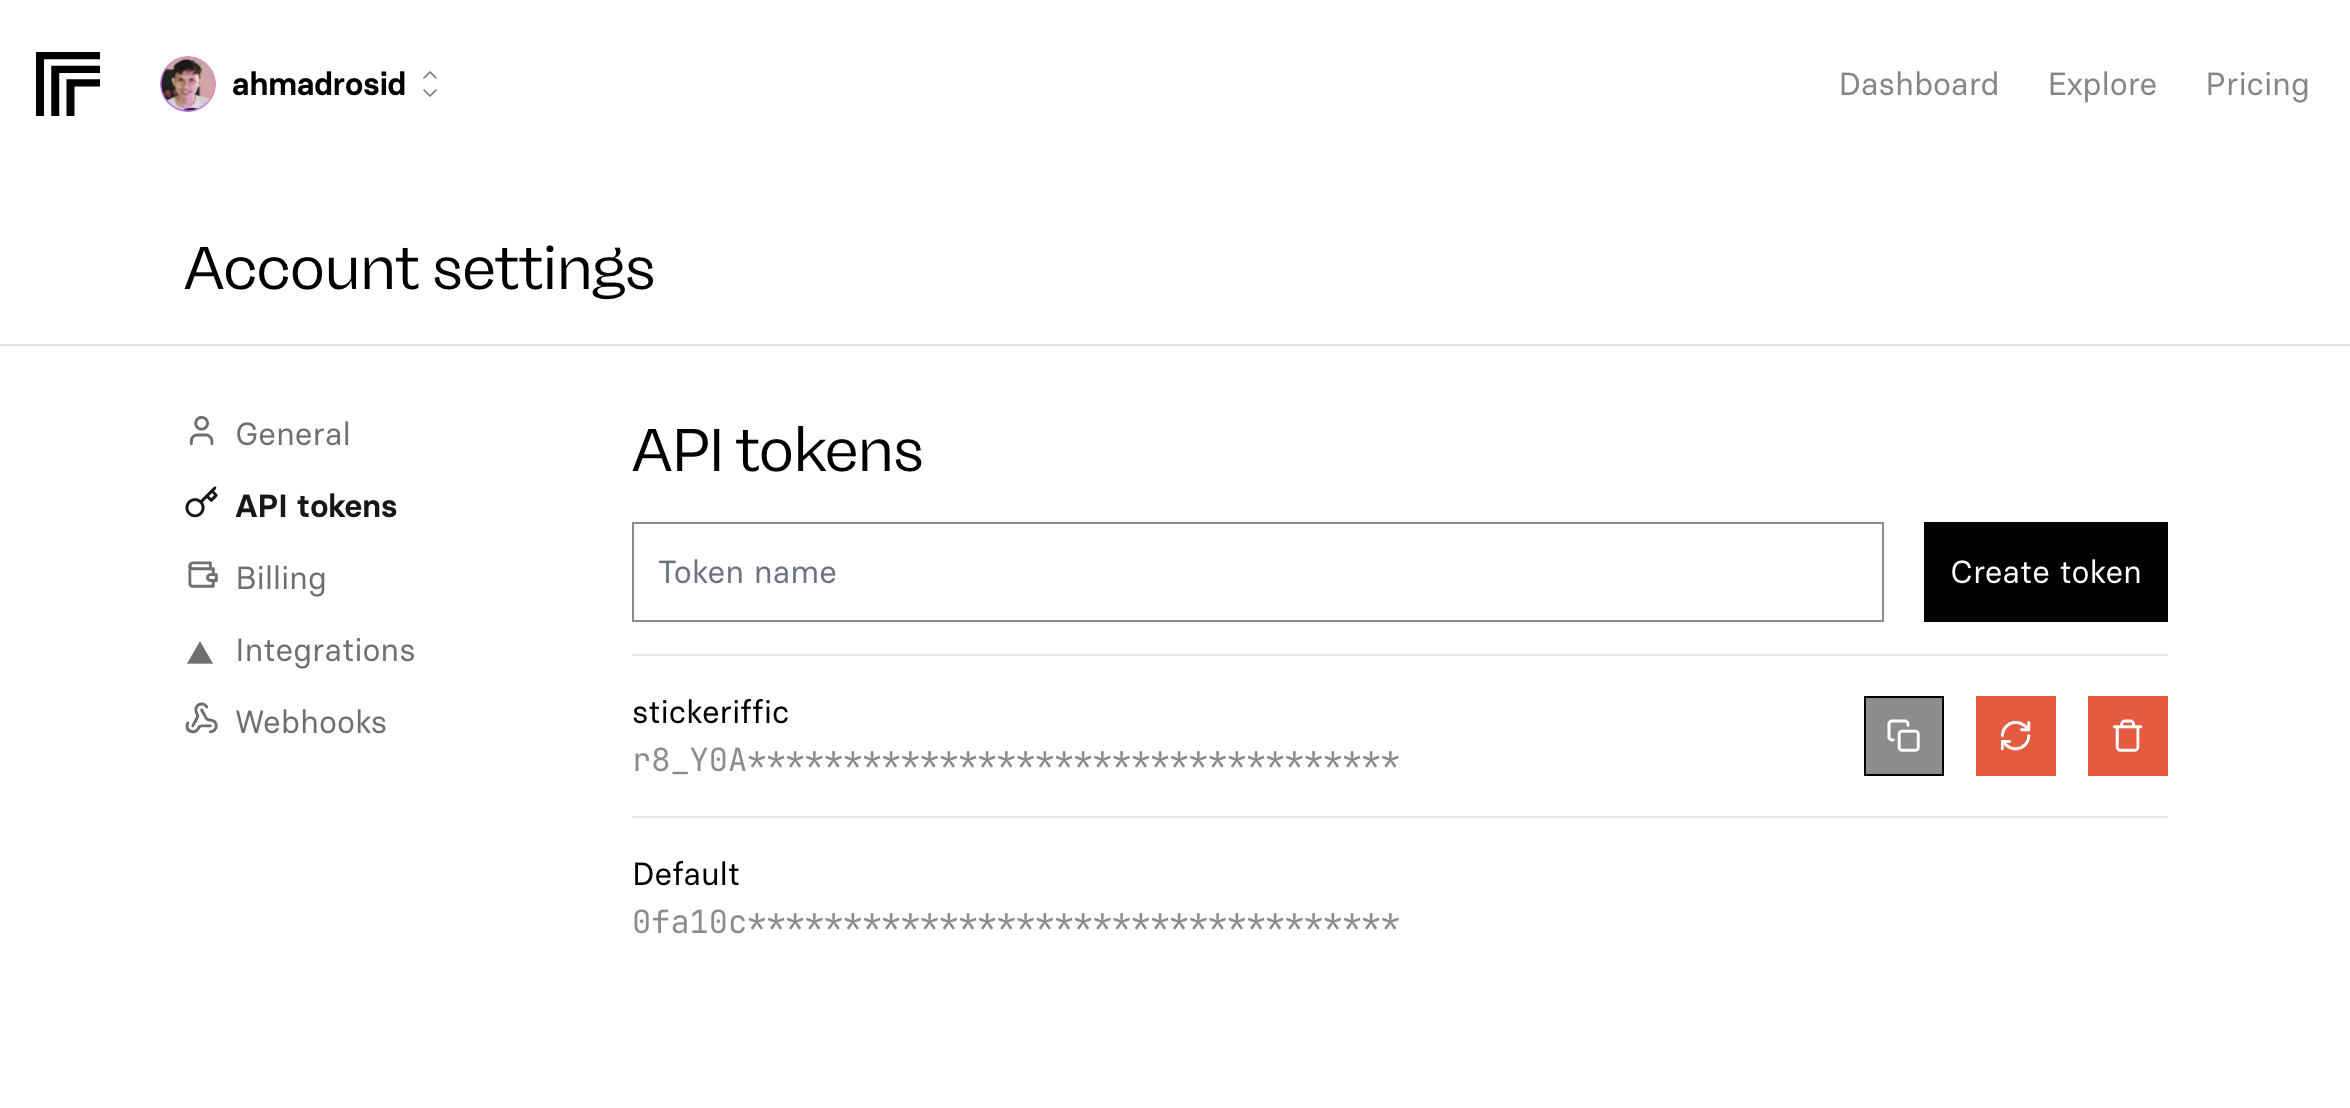
}Don't forget to grab replicate api token and put it into .env file with key REPLICATE_API_TOKEN, sign to replicate and got to account page https://replicate.com/account/api-tokens.
Integration with Tigris
First you can start deploying this project to flyio, you can just run command flyctl launch the rest will be configured by flyio automatically. After deployment create new Tigris storage.
flyctl create storageWith this command it will automatically configure all the necessary env that will connect your laravel application with Tigris storage.
Now let's install aws filesystem driver.
composer require league/flysystem-aws-s3-v3 "^3.0" --with-all-dependenciesThen set the env for this.
AWS_ACCESS_KEY_ID=tid_MvJ...
AWS_ENDPOINT_URL_S3=https://fly.storage.tigris.dev
AWS_REGION=auto
AWS_SECRET_ACCESS_KEY=tsec_W...
BUCKET_NAME=stickeriffic
AWS_BUCKET=stickeriffic
Don't forget to set your Tigris bucket to be public.
fly storage update stickeriffic --publicNow we can implement upload in generation controller like this.
use Illuminate\Support\Facades\Http;
use Illuminate\Support\Facades\Storage;

public function getGeneration(Request $request, $sticker_id) {
...
    if ($response->successful()) {
        $data = $response->json();
        if (isset($data['output'])) {
            $url_sticker = $data['output'][0];
            $fileContent = Http::get($url_sticker);
            $stickerId = $sticker->id;
            $filename = "prediction-{$stickerId}-sticker.png";
            $result = Storage::disk('s3')->put($filename, $fileContent);
            if ($result) {
                $sticker->sticker_url = Storage::disk('s3')->url($filename);
                $sticker->status = Sticker::STATUS_SUCCESS;
                $sticker->save();
            }
        }
        return response()->json([
            'data' => $sticker,
        ]);
    }
...
}
Conclusion
By following this guide, you now have the tools to build stateless Laravel applications that leverage the power and scalability of cloud storage with Tigris. Moving your file storage to the cloud opens up new possibilities for your application, allowing you to scale horizontally and provide a seamless experience for users, regardless of traffic spikes or geographic location.
The integration with Tigris is straightforward, thanks to its compatibility with Amazon S3 and the Laravel filesystem abstraction. Configuring Tigris storage is easy as well thanks to flyio that makes the command line easier to use. With just a few configuration changes and code updates, you can start uploading and retrieving files from Tigris, taking advantage of its reliable and secure cloud storage infrastructure.
You can grab full source code of this sample project on github here: https://github.com/ahmadrosid/Stickeriffic